This summer was probably one of my favorites, despite the COVID19 situation with lockdowns happened almost everywhere around the world. We took it positively and look on the brighter side of things that I have more time to think, redesign, improve and rebuild a better sailing kit for our Itiwit Inflatable Kayak (2 Seater) from Decathlon.

We made a decision to go into lockdown ourselves (before the UK government told us to) for almost 2 months at the end of March as we watched on the news that there were so many casualties reported on the news every single day.
It was scary thinking about what’s coming up next and also frustrating not getting to go out to make money and even worse, we couldn’t go to the beach either! Such a shame that we live literally 1 minute walk away from the beach.
Any new Improvements?
There sure is and it brings me the grin/smile lol. Because it definitely worked! Check this out.
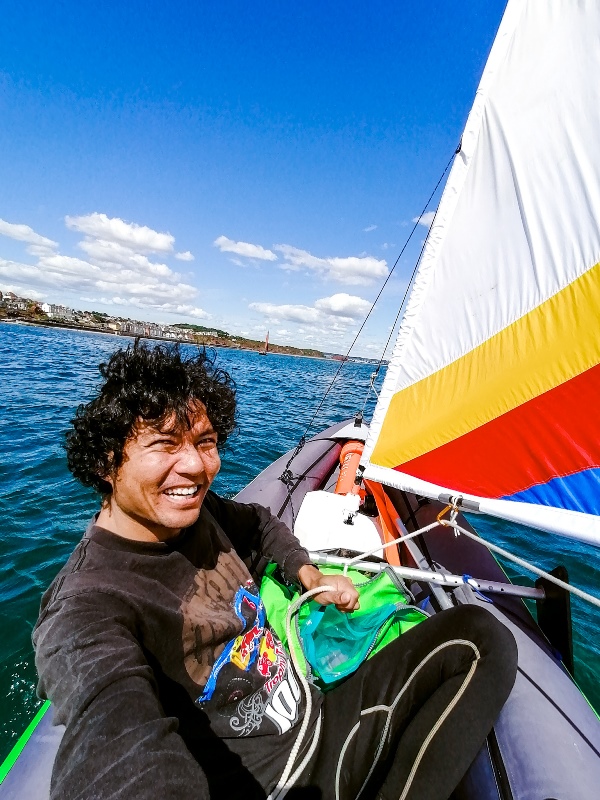
Pardon my crazy hair, it was darn windy, but I needed the wind to sail.
Rigging
This time round, I did further research on how to better control the main-sheet/boom. So I found some examples on how to loop the ropes around to make it more efficient.
I’ve used 3 x Aluminium Carabiners (or aluminum for you Americans) on my setup based on a Tiwal Inflatable Sailing Dinghy. Aluminium is strong, light and is harder to corrode/rust. By the way, the Tiwal is on my teenage-dream-mid-life-crisis wish-list. The only problem is, a Tiwal costs me 17 times more than our complete Itiwit 2 kit.
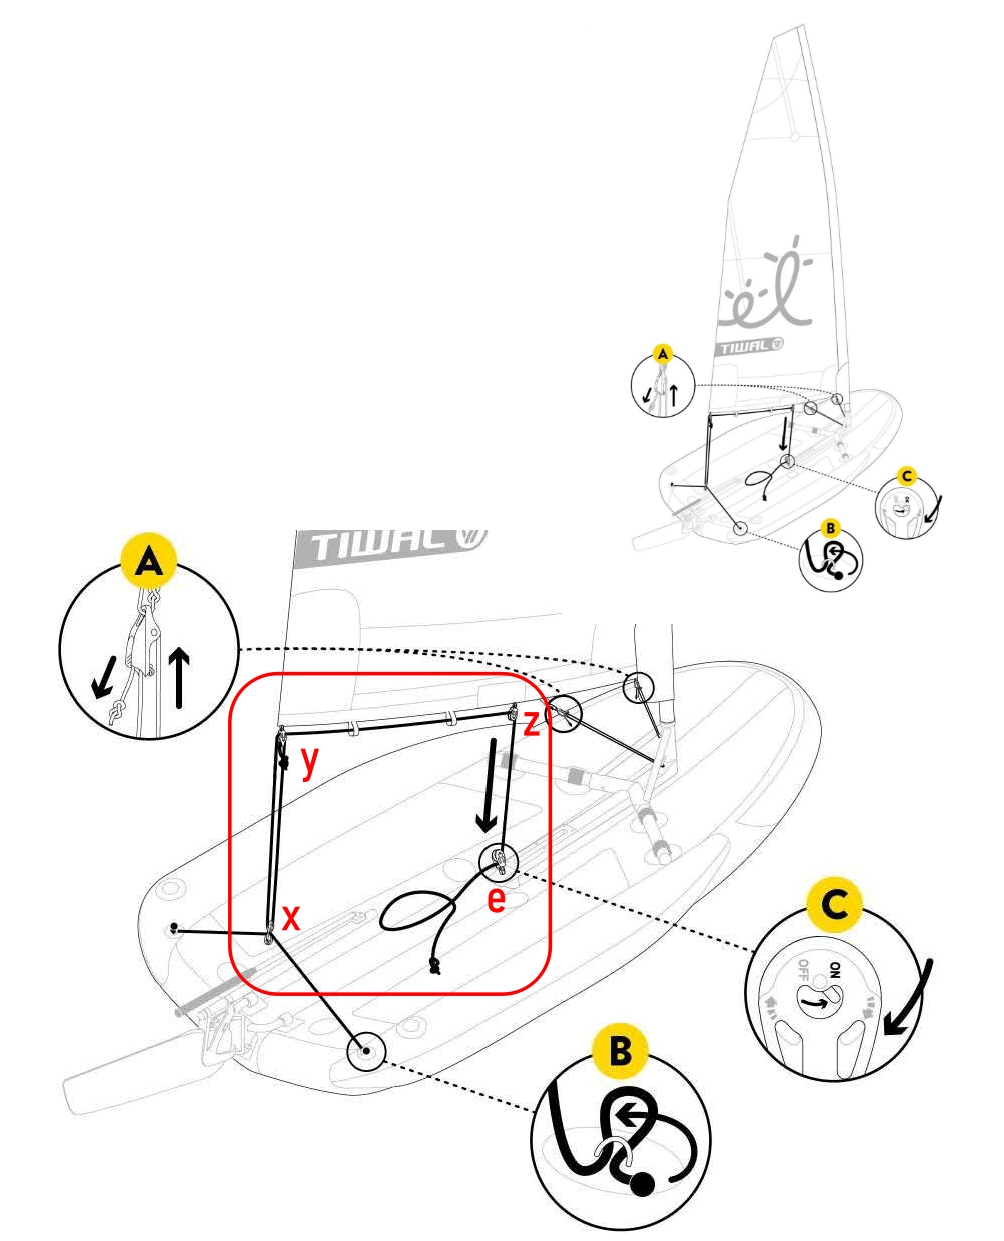
As you can see, there’s a long rope that was used for this rigging above to control the main sail.
We’ve used aluminium carabiners at positions x, y and z. As for position e, we’ve used an eyebolt at the moment as I thought it worked great giving some friction that acts as a line-cleat or brake for the rope.
On the next upgrade, I wish to source for x, y and z to be replaced with pulleys. Preferably made of nylon or aluminium. I might consider custom making this part if I can’t find them off the shelves.

The rope should be made of cotton or equivalent as it must feel good in your hands, flexible and not too rough like those hard plastic clothesline ropes. I got mine from the hardware store, it was 8mm thick and soft to grip.
I’ve also tied off the tag end with a double overhand stopper knot to avoid my line running out of the eyelet ‘e‘.

Main Sail

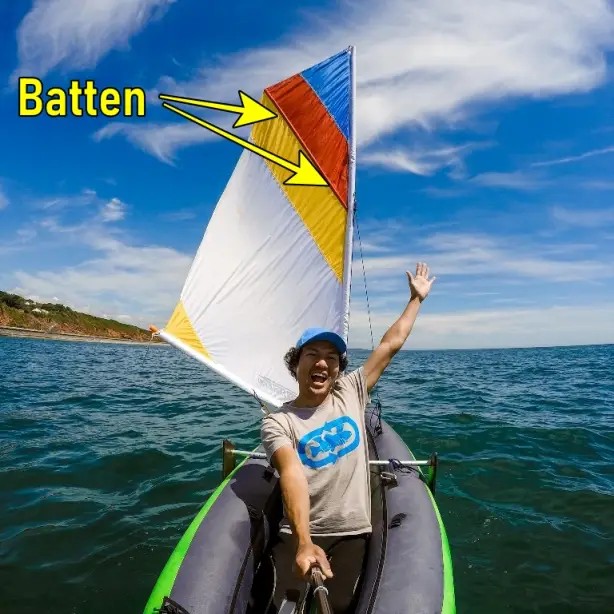
In Episode 4 : Upwind Runs! on YouTube, if you haven’t seen the last few episodes, I’ve upgraded the sail into a triangular shaped option. I did that because the previous versions with ‘battens’ didn’t look very pretty in my eyes.
There was too much ‘spill’ as the wind-surfing dudes call them, where the top of the sail twists away in the force of the wind. I reckon that my triangular shape looks better and has a better wind-flow = more sailing power!
With this triangular shaped sail, I managed to gain upwind sailing pretty well, rather than looking like a fool trying to force myself to sail, which I did in the first few sea trials. It all takes persistence, my friend.
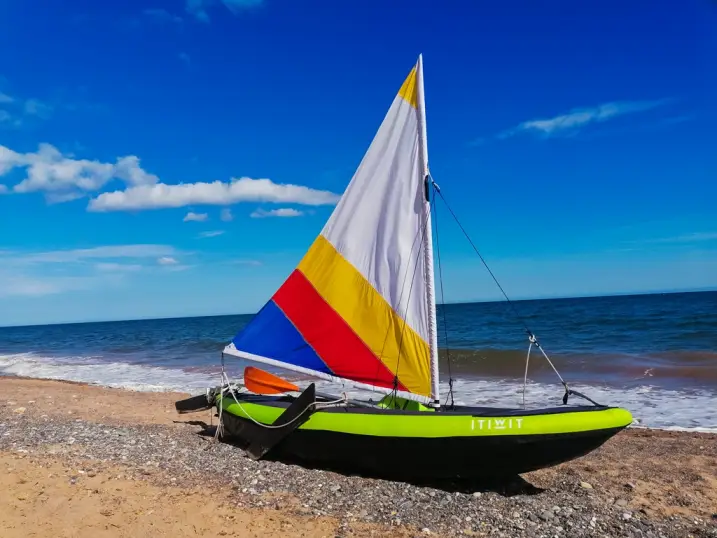
After cutting down my old SeaEagle sail, I have the other half that requires minimal work.
Well I know that I’ve cheated a little bit there by using a ready-made sail, but hey, that’s precious data we’ve got from the sea trials!
Drum rolls………..!
The Upwind Runs!
At first, I was planning for a short sail out, probably lasts 20-30 minutes just to see how it goes on the new sail setup.
The wind on that particular day was blowing at 7-8 knots and gusts were 10-12knots from inland out to sea (instantaneous data from Windy.com). Sun was shining bright, light clouds, temperature was 26-28 Celcius and waves was probably 0.2m at most, which was perfect!

As you can see, I did not sail 20-30 minutes, but I did went out for 3 hours and 54 minutes! Average speed was 2.4 knots in low winds and 10-20 second gusts got the kayak to 5.5knots.
Total sailing distance covered was 8.4 kilometres or 5.2 miles. That was good enough for an inflatable kayak.
Click on the image below to watch the video 🙂